Showing posts with label Windows. Show all posts

Wednesday, January 1, 2025

Different Ways to Take a Screenshot in Windows 10


Quick Preview to Take Screenshot on Windows 10:-

  1. Use the CTRL + PRT SC Keys to take a quick screenshot.
  2. Use ALT + PRT SC Keys to take a Screenshot of any application window.
  3. Use Windows + Shift + S Keys to access the Xbox Game Bar.
  4. Use Snip & Sketch Application as well to take screenshot 
  1. Taking Screenshots has become one of the necessary components of our daily life. Whatever device, we are using, we face the need to take screenshots there. Also no doubt, the Screenshots help to describe any action more clearly than any other means. Keep in mind that, Windows comes up with different Methods to Take Windows Screenshots.

In earlier times, there was only one way to Capture Screenshots on Windows. That is the using Windows Keyboard Shortcuts. But as the demand is increasing, there are more new ways introduced to Grab Screenshot on Windows 10. We can enlist 7 different methods to Get the Windows Screenshot.

This article is going to be a detailed guideline about the Ways to Take Screenshots in the Windows 10 operating system.

How to Take Screenshots in Windows 10

How to Take Screenshots in Windows 10? [7 Different Methods]

Methods to Take Screenshots on Windows 10

To Take Screenshots of the Windows Screen, the following methods can be used. In this guideline, we will start with the PRT SC Key execution.

Method 1: Take Screenshots on Windows using the Print Screen Button to Capture Full Screen

Step 1: When you have decided what you want to capture as a screenshot, tap on the PrtSc key on your keyboard immediately. 

Use the Print Screen Button to Capture Full Screen


Step 2: The previous step will automatically get a screenshot of the screen and store it in the clipboard of your Windows PC. Since it will not save directly as an image, you can open another editor app, like Paint.

Using Paint to Save the Screenshot


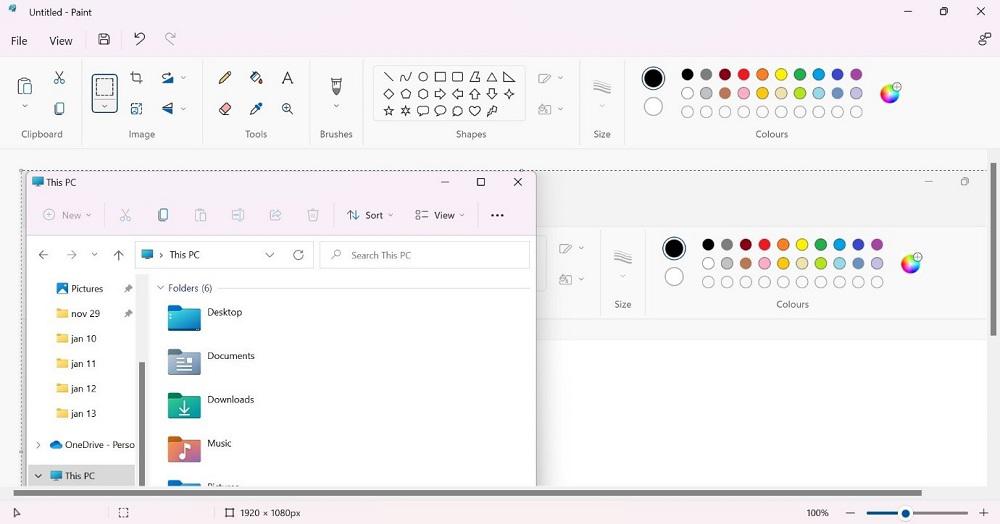
Step 3: On the clear white canvas of the Paint app, put the cursor on the page and press Ctrl + V keys. This will drop the image from the clipboard onto the page.

Step 4: Click on File > Save As. Name the screenshot and choose the location to save it in. Then, press the Save button.

Method 2: Take Screenshots on Windows of a Specific Window

Step 1: When you have many windows open on your device, press the Alt + Win + PrtSc keys together.

Step 2: The screenshot will be stored immediately in the folder named Videos > Captures once you press the Alt + Win + PrtSc keys.

Grab the Screenshot of a Specific Window


Method 3: Take Screenshots on Windows Whole Screen

If you want to take a quick and accurate screenshot on your screen and avoid saving it into the clipboard, you can press the Windows and PrtScn keys together. This will bring up the thumbnail on the screen at the bottom-left side when the screenshot capture step is done. 

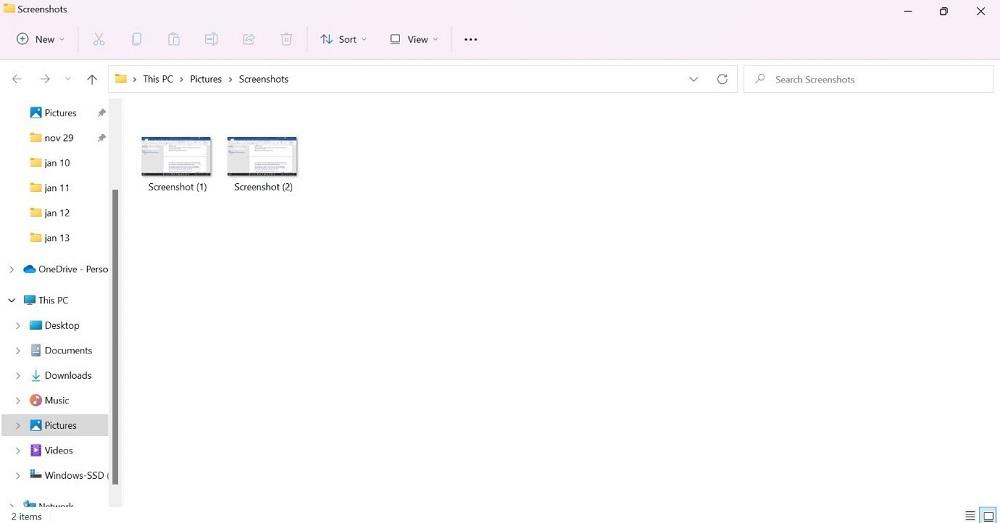
You will find the screenshot in your device’s Pictures/Screenshots folder, accessible through the File Manager

Take a Screen Clip of the Whole Screen


Method 4: Take Screenshots on Windows using the Snipping Tool

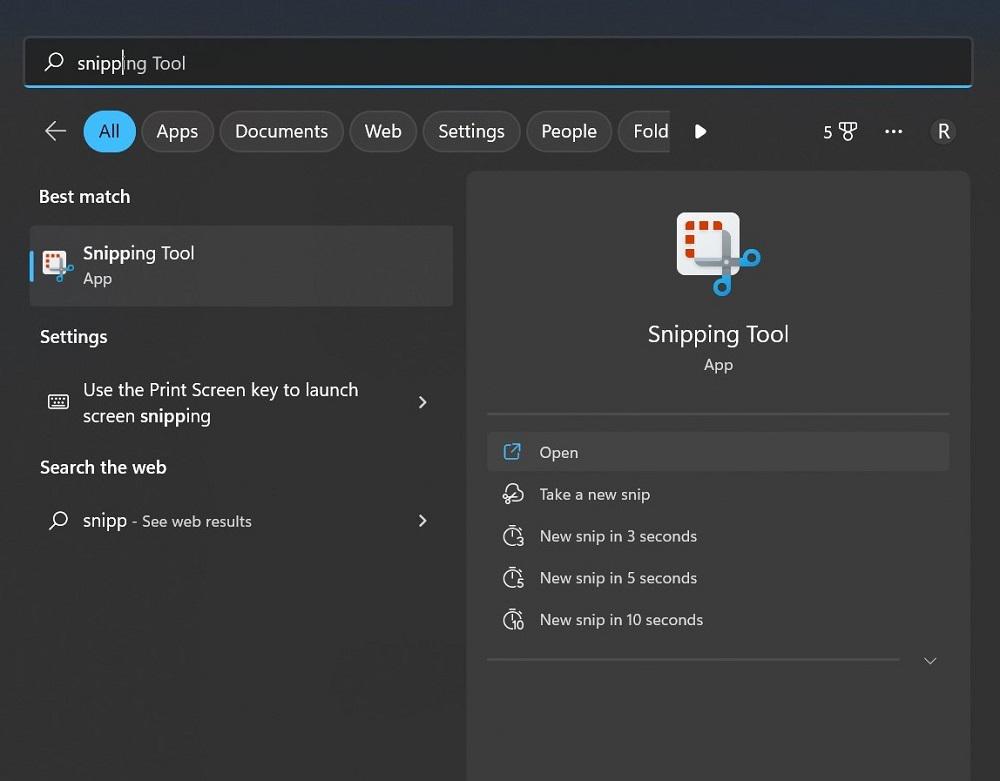
Step 1: When you need to screenshot something on the screen, tap on the Windows button (⊞ ) from the taskbar below. 

Step 2: Type in the Snipping tool in the search field. Click on the first app option that comes in the result to open it. 

Grab a Screenshot using the Snipping Tool


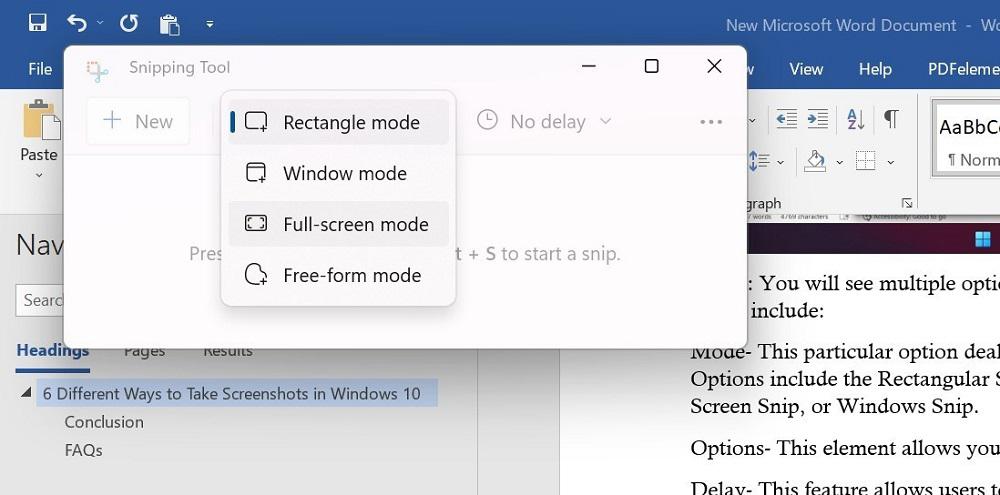
Step 3: You will see multiple options in the app when it opens on your Windows 10 PC. These include:

  • Mode – This particular option deals with the style of screenshot you choose. Options include the Rectangular Snip, a default option, Free-Form Snip, Full-Screen Snip, or Windows Snip. 
  • Options – This element allows you to switch between the options for the Snipping Tool. 
  • Delay – This feature allows users to delay the screen capture for 1-5 seconds. 

Modes of snipping tool

Step 4: After setting up the features for the Snipping Tool to take the screenshot, press the New Option. The screen will appear with a white overlay showcasing the uncaptured area. 

Step 5: The screenshot will appear in the Spinning Tool after you capture one. 

Step 6: Tap on the File tab and choose the “Save As” option to move the screenshot to your preferred location on the hard drive. The app does not automatically save the screenshots anywhere. 

Method 5: Take Screenshots on Windows using the Snip & Sketch Tool

Step 1: Go to the window or page you will capture. Press Win + Shift + S keyboard shortcut or click the Start menu from the taskbar > type Snip & Sketch > tap the option.

Step 2: After the tool opens, you will see many options as icons, like:

  • Freeform– For drawing a custom shape that you create to screenshot. 
  • Rectangle– Capture a screenshot of the screen within a rectangle shape you expand or decrease with your mouse. 
  • Full-screen Snip– The screenshot of the entire PC screen or the screens of multiple monitors (if you are using many of them). 
  • Window Snip– This mode captures only the screenshot of the window you are currently using. 
    If you want to change your choice, tap on X to close the tool. 

Step 3: After capturing the screenshot, the image will be saved in the clipboard. Click on it from the notification that pops up on your screen. Tap on it for markup/file sharing. 

Step 4: If the popup notification does not appear, go to the Notifications bar at the right part of the screen to access the Snip & Sketch tool. 

Step 5: Save the file in the Paint app to cut the screen size. Then save the file. 

Method 6: Take Screenshots on Windows using the Game Bar 

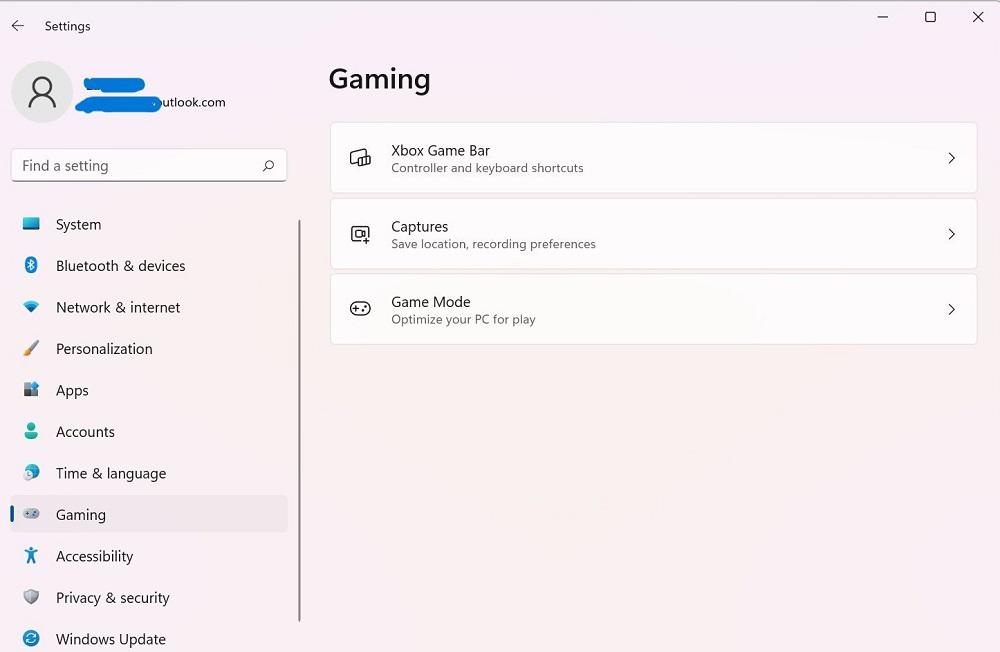
Step 1: For this app to work for screenshotting, you have to activate the Game Bar feature on your PC first.  For that, go to Settings > Gaming. Then, activate the slider for the Game Bar operation in the next window.

Go to Settings in your desktop and tap on the XBox Game Bar button

Step 2: On your PC, tap the Win + G keys to access the Game Bar. 

Step 3: Then tap on the Capture option. Or, press Win + Alt + PrtSc

Step 4: The full-screen screenshot of the window you capture automatically saves into Videos > Captures. Click on it from File Manager to find and use it later. 

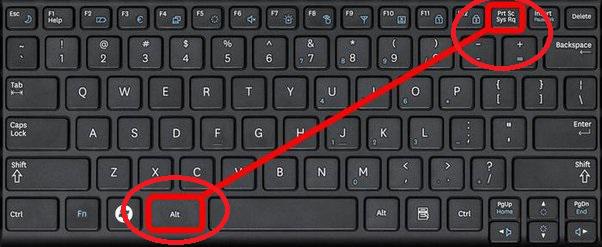
Method 7: Take Screenshots on Windows using the Alt + Prt Sc

Step 1: Go to the desired screen of which you’re looking to take the screenshot and hit Alt + Prt Sc (Print screen) at the same time.

Step 2: You will be required to select the desired area in which you want to take the screenshot, click, the and save it as required.

Step 3: An image will be copied and can be pasted simply on the Paint app.

Use the Alt + Prt Sc to Capture the Screen

Taking a Screenshot on PC isn’t a tough task, even if you aren’t a tech-savvy person. All you need to do is follow this step-by-step Guide to Take Screenshots of anything on your PC. Use the simple PrtSc key for this process or different tools available on the device. Follow the steps correctly to avoid errors with this function on a Windows PC.


Tuesday, November 26, 2024

Windows Keys

 ● Windows key → Open or close Start Menu.

● Windows key + A → Open Action center.
● Windows key + C → Open Cortana in listening mode.
● Windows key + D → Display or hide the desktop.
● Windows key + E → Open File Explorer.
● Windows key + G → Open Game bar when a game is open.
● Windows key + H → Open the Share charm.
● Windows key + I → Open Settings.
● Windows key + K → Open the Connect quick action.
● Windows key + L → Lock your PC or switch accounts.
● Windows key + M → Minimize all windows.
● Windows key + R → Open Run dialog box.
● Windows key + S → Open Search.
● Windows key + U → Open Ease of Access Center.
● Windows key + X → Open Quick Link menu.
● Windows key + Number → Open the app pinned to the taskbar in the position indicated by the number.
● Windows key + Left arrow key → Snap app windows left.
● Windows key + Right arrow key → Snap app windows right.
● Windows key + Up arrow key → Maximize app windows.
● Windows key + Down arrow key → Minimize app windows.
● Windows key + Comma → Temporarily peek at the desktop.
● Windows key + Ctrl + D → Add a virtual desktop.
● Windows key + Ctrl + Left or Right arrow → Switch between virtual desktops.
● Windows key + Ctrl + F4 → Close current virtual desktop.
● Windows key + Enter → Open Narrator.
● Windows key + Home → Minimize all but the active desktop window (restores all windows on second stroke).
● Windows key + PrtScn → Capture a screenshot and save in Screenshots folder.
● Windows key + Shift + Up arrow → Stretch the desktop window to the top and bottom of the screen.
● Windows key + Tab → Open Task view.
● Windows key + "+" key → Zoom in using the magnifier.
● Windows key + "-" key → Zoom out using the magnifier.
● Ctrl + Shift + Esc → Open Task Manager.
● Alt + Tab → Switch between open apps.
● Alt + Left arrow key → Go back.
● Alt + Right arrow key → Go forward.
● Alt + Page Up → Move up one screen.
● Alt + Page down → Move down one screen.
● Ctrl + Alt +Tab → View open apps.
● Ctrl + C → Copy selected items to clipboard.
● Ctrl + X → Cut selected items.
● Ctrl + V → Paste content from clipboard.
● Ctrl + A → Select all content.
● Ctrl + Z → Undo an action.
● Ctrl + Y → Redo an action.
● Ctrl + D → Delete the selected item and move it to the Recycle Bin.
● Ctrl + Esc → Open the Start Menu.
● Ctrl + Shift → Switch the keyboard layout.
● Ctrl + Shift + Esc → Open Task Manager.
● Ctrl + F4 → Close the active window.


20 Microsoft Word Shortcut Keys


● Ctrl+W → Close the active window / document.
● Ctrl+Z → Undo an action.
● Ctrl+Y → Redo the last action or repeat an action.
● Ctrl+S → Save a document.
● Ctrl+P → Print a document.
● Ctrl+K → Insert a hyperlink.
● Alt+Left → Arrow Go back one page.
● Alt+Right → Arrow Go forward one page.
● Ctrl+C → Copy selected text or graphics to the Office Clipboard.
● Ctrl+V → Paste the most recent addition to the Office Clipboard.
● Ctrl+Shift+A → Format all letters as capitals.
● Ctrl+B → Applies or removes bold formatting.
● Ctrl+I → Applies or removes italic formatting.
● Ctrl+= → Apply subscript formatting (automatic spacing).
● Alt, F, A → Save As.
● Alt, S, T, I → Insert Table of Contents.
● Alt, S, T, R → Remove Table of Contents.
● Alt, W, F → Full Screen Reading – View > Document Views > Full Screen Reading.
● Alt, W, R → Ruler. View > Show/Hide > Ruler.
● Alt, F, X → Exit Word.

Monday, April 22, 2019

20 Facts About Microsoft That You Probably Don’t Know

Short Bytes: Microsoft, headquartered in Redmond, Washington, has been in the software industry since the mid-1970s. They have proved their dominance by launching some revolutionary products like Windows and Microsoft Office. Here are some facts which you might not know about Microsoft.
Microsoft has been in the computer business since the mid-70s and they’ve been the pioneer in the software industry since then. Co-founded by Bill Gates and Paul Allen on April 4, 1975, the company has been synonymous with the word Operating System as many of us used our first computer that was powered by Windows operating system. Here are some facts which you might not know about your Redmond-based Company:

1. MS-DOS was not their first Operating System:

microsoft xenix
The very first operating system they coded was XENIX, not MS-DOS. In fact, MS-DOS was a modified license version of the 86-DOS, which was also known as Quirky and Dirty DOS, created by Seattle Computer Products in 1980. Furthermore, XENIX was also a version of the UNIX operating system but was differently named.

2. Microsoft started with another name:

Microsoft started their journey with a hyphen, I mean they were titled as Micro-Soft in their initial days. The hyphen was deleted in 1976. The term Microsoft is a combination of microcomputer and software.

3. $16000 for the first year:

The company whose ex-CEO was the world’s richest man for years had only $16,000 as the revenue for the first year.

4. The wannabe Casanova:

microsoft bill gates
Bill Gates coded the class scheduling program for his high school. He wrote the code in such a way that he was allotted a seat next to girl students.

5. Mac before Windows:

microsoft office for mac
Microsoft’s Office has been praised for its huge portfolio of awesome features, but you’ll be amazed to know that Office for Macintosh was released a year before (in 1989) it was released for Windows.

6. The first Virus for Windows:

microsoft first virus
WinVer 1.4 was the first virus program coded for Microsoft Windows and it was releasedin 1992.

7. All about Patents:

Microsoft holds more than 10,000 patents and they’ve successfully made to the list of top-five patent holders in the USA. Microsoft files around 3,000 patent requests per year.

8. The folder you can’t create:

One of the easiest tasks on Windows in creating folders and you make many of them on a daily basis. But you can’t create a folder named “CON” in Windows.
And I can bet you gave it a try and didn’t succeed, this is because Windows doesn’t allow some special characters to be a part of the folder name.

9. They like Code-names:

microsoft windows blue
Microsoft has their legacy of giving code-names to their products since the time of Windows 3.1x family. For example, Windows 8.1 is called Blue and Windows Phone 8 is known as Apollo. 

10. The Dash Trash email addresses:

Microsoft employees who work on a temporary basis are assigned email addresses with a dash before the ‘@’ symbol ( -@) and are referred to as Dash Trash by permanent workers.

11. Why is manhole cover round?

These are the kind of questions asked in the interviews, probably to judge the creativity of the person.

12. Billionaire by 31:

microsoft bill gates
Microsoft’s co-founder Bill Gates was a billionaire by the time he turned 31. In 2005, he was awarded Knighthood by the Queen of England.

13. They love M&Ms:

microsoft m&m
Microsoft loves to celebrate events with M&M candies, in fact, its kind of a tradition in the company since a long time. If you are an employee celebrating your birthday, you need to give 1 pound of M&Ms for every year you’ve worked at Microsoft.

14. They had a tablet long ago:

microsoft windows xp tablet
Microsoft introduced their first Windows XP-based tablet in 2001, but only contributed to the biggest blunders in their history. It was a touchscreen tablet with a stylus and a keyboard.

15. Call me “Softie”:

microsoft employees
The Microsoft employees have a usual age 38 with an average pay of $100,000 for a developer. They like to call themselves “Softie”.

16. The Art Fans:

microsoft gallery
Microsoft has one of the biggest art collection at around 150 of their office locations, as they believe art in the workplace reduces tension and enhances productivity. The Microsoft Art Collection showcases 4,728 pieces, including work from Cindy Sherman, Chuck Close, and Takashi Murakami.

17. The Interface Manager:

microsoft interface manager
The very famous Windows operating system was initially titled as Interface Manager. Thank god, someone intervened and saved Microsoft from the disastrous path.

18. The “Microsoft Rescued Apple in the summer of 1997” myth:

microsoft saved apple
Apple had its dark days in the 1990s when Jobs was not there for the company. One myth that has been floating around since the time Jobs was re-appointed as the CEO of Apple, that Bill Gates promised Steve Jobs that he would invest $150 million in Apple, which was on the verge of bankruptcy.

19. Far reached out:

microsoft product wallpaper
More than 1.5 billion people use Windows every day, and 1.2 billion people use Microsoft Office – this is around “1 in every 7” people on earth. Microsoft’s Outlook has 400 million active users and around 3 billion minutes of Skype calls are made every day.

20. The Charity:

gates foundation
Microsoft’s co-founder Bill Gates donated his whole wealth to charity for two times. He also started the Bill and Melinda Gates Foundation, engaged for the upliftment of people in poor and developing nations.